Common Support Solutions To Keep Your Internet Running Smooth
Common Support Solutions To Keep Your Internet Running Smooth
PVT is here to help you every step of the way. Choose a category like “Email” or “Internet” to explore easy-to-follow guides and tips.
Need to get in touch? Call us at 575-748-1241, chat with us using the “Contact Us” feature below during business hours, or email us anytime at [email protected].
We’re always happy to assist you!


Phone Line Advanced Features


Watch the video below for instructions on performing setting up your router.
Step-by-step guidance to get seamless connectivity for your wired devices. Find out how by watching the video.
Implement customized safety settings for every member of your household. Learn how in the video.
Simplify your network management effortlessly. Watch the video to see how it’s done.
Stay a safe online with advanced protection. Watch the video to learn how.
Keep your kids safe online with powerful tools. Discover how in the video.
If the screen is stretched or distorted, the aspect ration may be set wrong. If your TV is connected to the cable box with an HDMI cable, you can adjust the aspect ratio by following the instructions below.
- Access the Menu:
Push the Menu key located at the top-right corner of your remote.
- Navigate to HDMI Setup:
Use the arrow keys to find and select the HDMI Setup menu item.
- Adjust the Aspect Ratio:
In the menu, select TV Aspect Ratio and choose the correct option that matches your TV’s display settings.
- Apply the Changes:
Once the correct aspect ratio is selected, press the Apply button to save the settings.
If you’re still experiencing display issues, our friendly support team is here to assist. Contact us anytime for help!
Secure your network with personalized settings. See how in the video.
PVT blocks, restricts or filters a few internet ports to protect our customers.
When ports are known to cause vulnerability to the security and privacy of your information, PVT blocks it to protect you. This protects you from common worms and from dangerous services that could allow intruders access to your computer. Below is a list of the ports that are restricted by PVT.
| Port | Transport | Protocol | Direction | Reason for Filtering |
|---|---|---|---|---|
| 17 | TCP/UDP | QOTD | Inbound | Used in DRDoS (distributed reflective denial of service) amplification attacks. Reference: https://www.us-cert.gov/ncas/alerts/TA14-017A |
| 19 | TCP/UDP | CharGEN | Inbound | Used in DRDoS (distributed reflective denial of service) amplification attacks. Reference: https://www.us-cert.gov/ncas/alerts/TA14-017A |
| 23 | TCP | Telnet | Inbound | N/A |
| 25 | TCP | SMTP | Both | Port 25 is unsecured, and Botnet spammers can use it to send spam. This does not affect PVT email usage. We recommend learning more about configuring your email settings to PVT email to use port 587. |
| 111 | TCP/UDP | NetBios | Both | Portmapper used in reflective DDOS Attacks |
| 135-139 | TCP/UDP | NetBios | Both | NetBios services allow file sharing over networks. When improperly configured, ports 135-139 can expose critical system files or give full file system access (run, delete, copy) to any malicious intruder connected to the network. |
| 161 | UDP | SNMP | Inbound | Used in DRDoS (distributed reflective denial of service) amplification attacks. Reference: https://www.us-cert.gov/ncas/alerts/TA14-017A |
| 445 | TCP | MS-DS/SMB | Both | Port 445 is vulnerable to attacks, exploits and malware such as the Sasser and Nimda worms. |
| 1080 | TCP | SOCKS | Inbound | Port 1080 is vulnerable to, among others, viruses, worms and DoS attacks. |
| 1433 | TCP | MS-SQL | Inbound | Worms, Trojans |
| 1434 | UDP | MS-SQL | Inbound | Worms, SQLslammer |
| 1900 | UDP | SSDP | Both | Port 1900 is vulnerable to DoS attacks. UPnP |
| 5351 | UDP | SSDP | Both | Port 5351 is vulnerable to DoS attacks. NAT port mapping. Similar to UPnP |
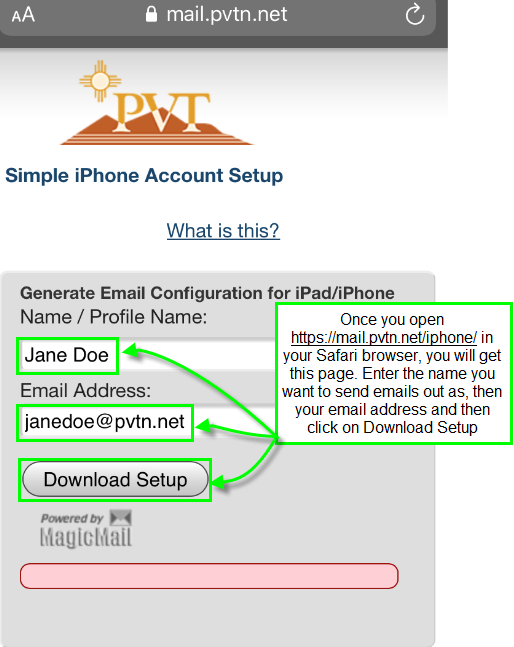
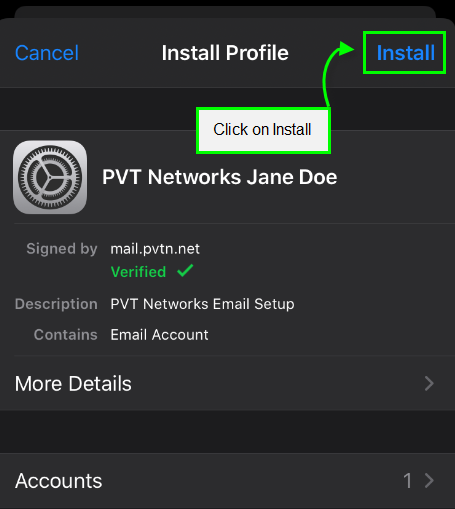
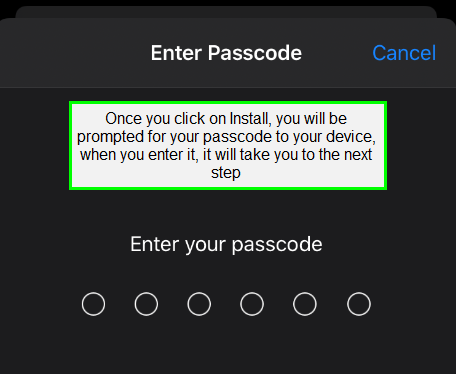
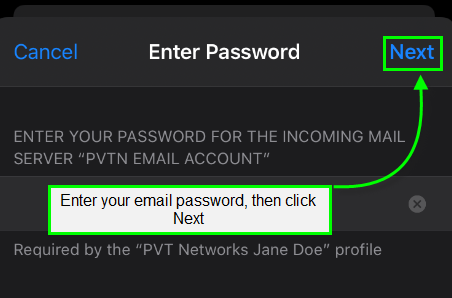
iPhone/iPad email setup (example setup from iOS 10.3.3).
Using Safari, tap on this link: https://mail.pvtn.net/iphone/

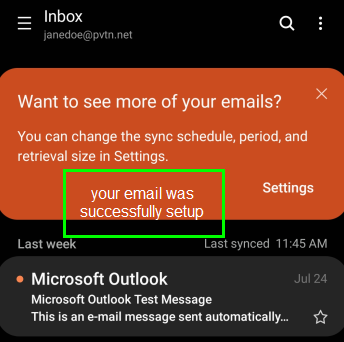
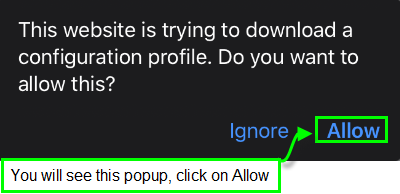
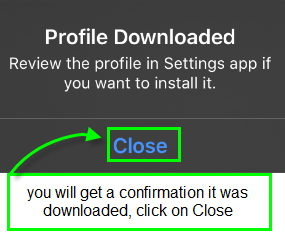
It will ask you for confirmation.


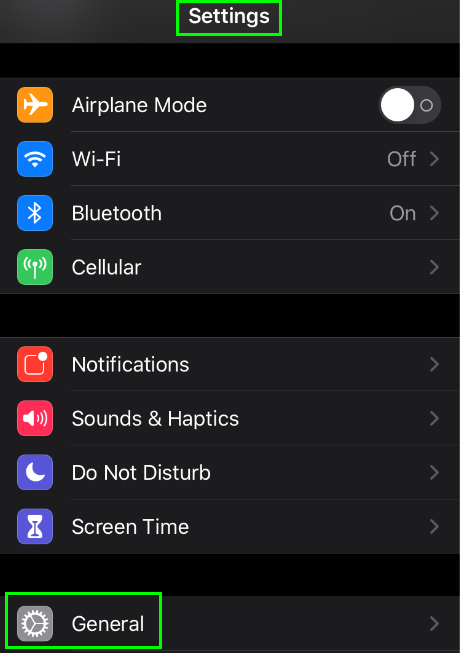
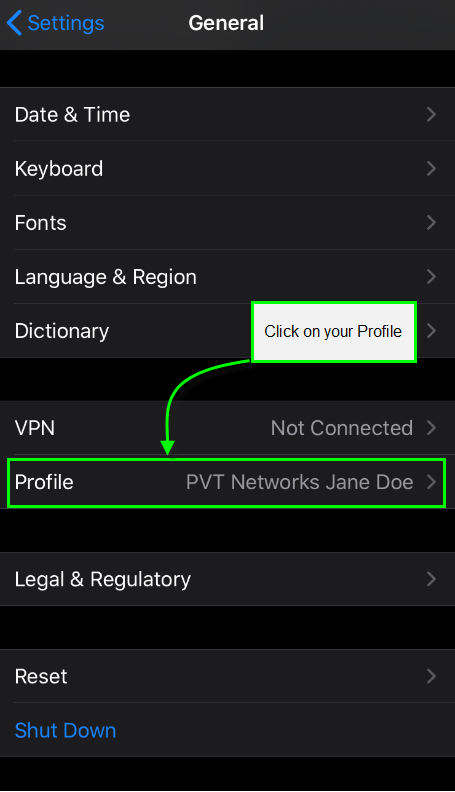
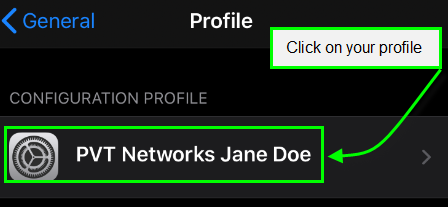
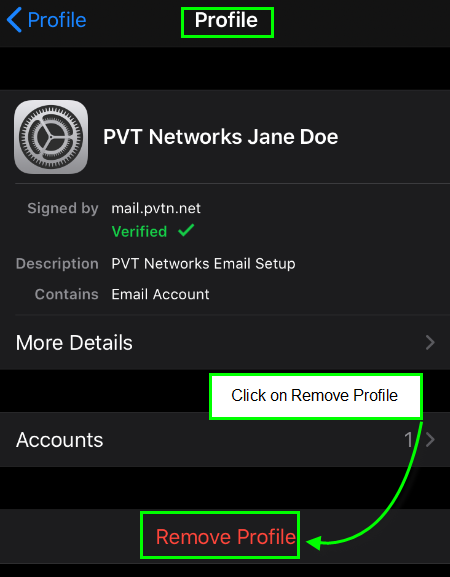
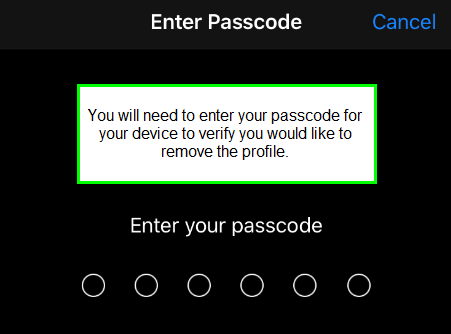
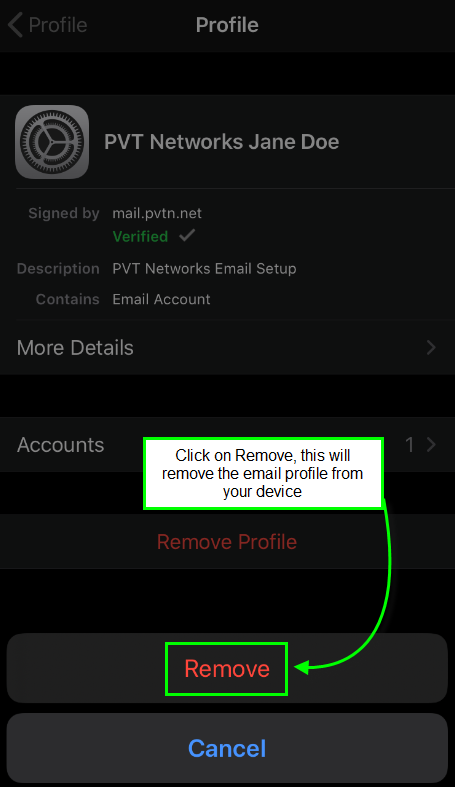
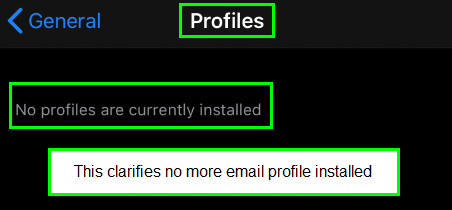
If you need to remove an email account from your older iPad device, go to Settings, General, and click on Profile.


To remove an account from a newer iOS device, navigate to your settings and select “Passwords and Accounts.”
From the “Accounts” section, tap an email account – once done, scroll to “Delete Account.”

- Go to Mail on the menu and select Preferences
- On the menu that pops up click the + on the bottom left
- This will bring up a new window, type your Full Name, Email Address and Password then press continue
- On the next windows select IMAP from the drop down, then fill in the description, the incoming mail server, enter mail.pvtn.net, use your full email address as the login User Name and your email account password. Press Continue
- For outgoing mail server, enter a Description, for the Outgoing Mail Server, enter mail.pvtn.net put a check mark in Use Authentication, then use your full email address as the User Name and enter your email account password. Press Continue
- Press Create
- Another window will pop up, once all information has been verified, click on the red circle at the top left corner.


To change options, such as email forwarding, password, and vacation response, click on the “Email Options” link:

Monitor and manage app access with confidence. See the process in the video.
- Click on the Display Thunderbird menu icon
- On the menu that loads go to Preferences and select Email
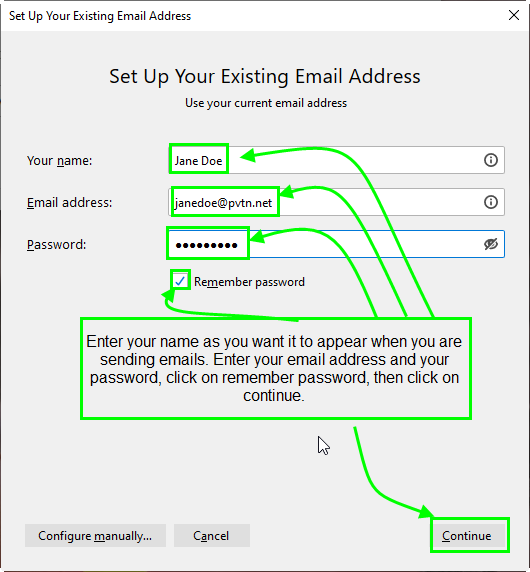
- Now type in Your Name, Email address and Password and click Continue
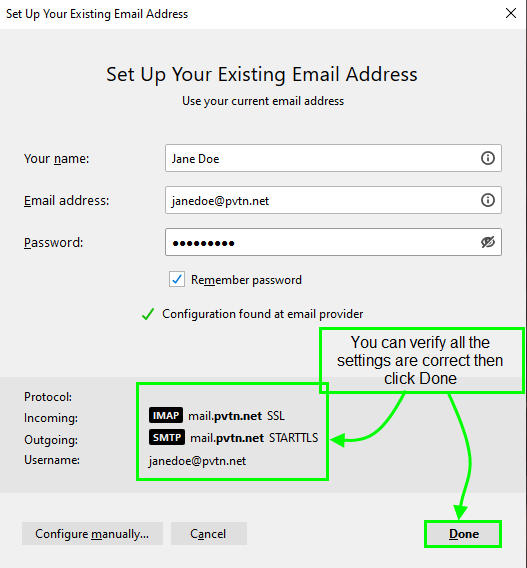
- Make sure for incoming server IMAP is selected then press Manual config
- EFor incoming and outgoing Server hostname use mail.pvtn.net, verify that the incoming port is 993
- For SSL, select SSL/TLS for the incoming and Autodetect for Authentication
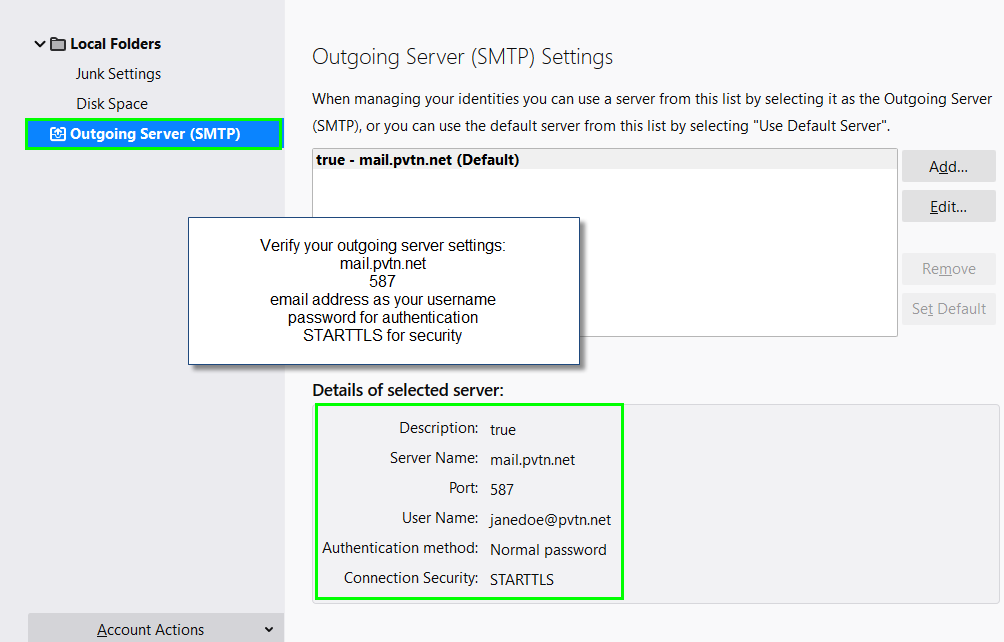
- For SSL, select STARTTLS for the outgoing and Autodetect for Authentication, verify that the outgoing port is 587
- For Username on both incoming and outgoing, use your full email address (if you type in your email address into the incoming server, the outgoing server will auto populate)
- Click on Re-test
- Click on Done


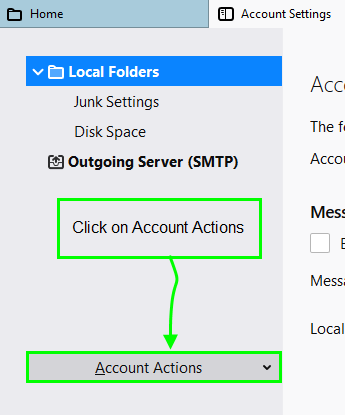
- Click File
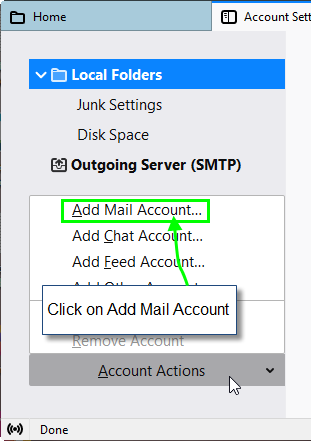
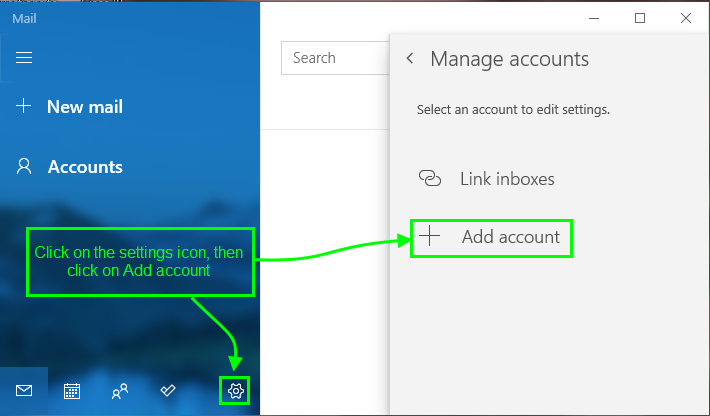
- Select Add Account
Type your name (the way you would like it displayed when sending mail), your email address, and your password/confirm your password, click next - The congratulations page should appear, place a check mark in the change account settings and click next
- Verify the incoming mail server:
Account type: IMAP
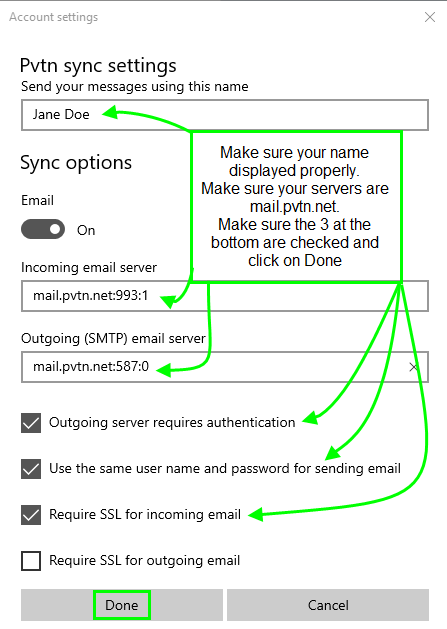
Incoming mail server: mail.pvtn.net
Outgoing mail server: Change to: mail.pvtn.net - Type your full email address for the username
Make sure the checkmark is in the checkbox for Remember password - Click on more settings
The general tab shows your email
On the outgoing server tab, verify there is a check mark in my outgoing server (SMTP) requires authentication
On the advanced tab:
Incoming server (IMAP): 993
Use the following type of encryption: SSL
Outgoing server (SMTP): 587
Use the following type of encryption: TLS
Check mark in Purge items when switching folders while online - Once the Test Account Settings has completed, click on Close
- Then click on Finish


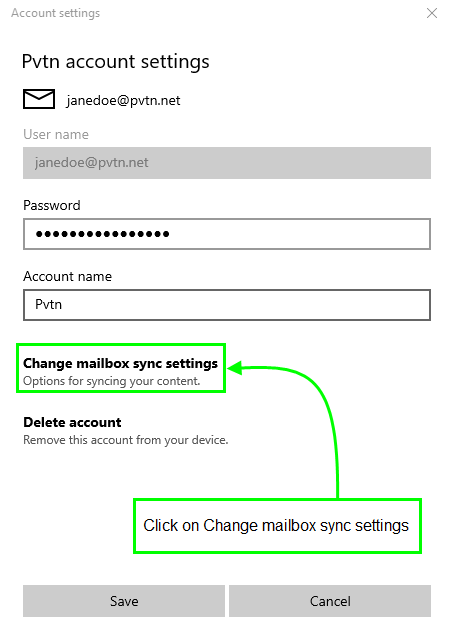
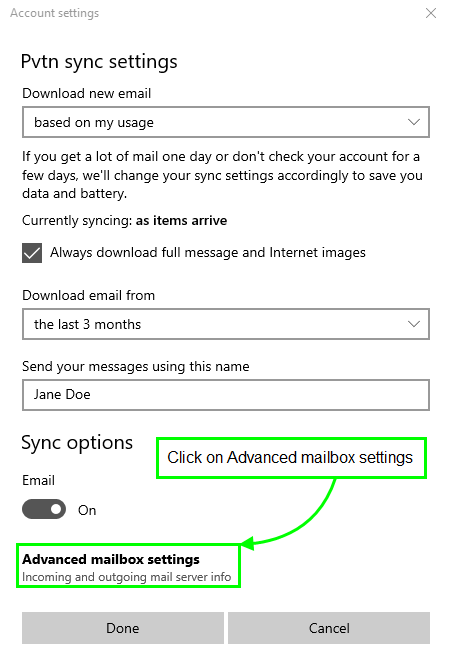
Go to control panel, choose Mail.


If your device supports WPS, simply follow the instructions included with your device’s installation manual. Press the WPS button for less than 3 seconds on the back of the PVT router when instructed.
The PVT ConnectIQ App makes managing people, places and things easy. Learn more in the video.
If your TV screen isn’t displaying correctly—such as black frames around the image or a cropped picture—it may be due to an incorrect zoom level or aspect ratio setting.
Symptoms of Incorrect Settings:
- The image doesn’t fill the screen.
- There’s a black border surrounding the picture.
- The picture appears stretched or cropped.
How to Fix It:
- Check Your TV’s Settings:Locate the zoom level or aspect ratio settings in your TV’s menu. Common options include “Zoom,” “Wide,” or “Fit to Screen.”
- Consult Your TV User Manual:For detailed instructions, refer to the user manual for your TV model. This will provide guidance on adjusting the settings for optimal viewing.
- Reset to Default Settings (if available):Some TVs offer a quick reset option to restore the default display settings.
Need help? Our support team is here to guide you through the process. Contact us, and we’ll ensure your viewing experience is perfect!
Maintain control of your WiFi network with real-time device insights. Find out how in the video.
Unlock voice-controlled convenience in minutes. Watch the video to learn how.
Manage device usage effortlessly for your family. Watch the video to find out how.
Provide WiFi access to guests without compromising your security. See the steps in the video.
Learn how to quickly and securely share WiFi access with visitors. Watch the video to see how.
- If you are using PVT web mail, below are instructions on accessing and managing your spam features.
- To check your new PVT spam folder, go to https://mail.pvtn.net
- Type your full email address and password into the webpage and click on “Sign in”.

You can click on the Spam folder as shown below to view your Spam messages:

If you want to change your spam settings or enable/disable the spam processing for your mailbox click on the “Spam Settings” link.

If you are using IMAP on your phone or email client you can also check your spam by going to the Spam folder as shown below:
In Microsoft Outlook:

On iOS devices (such as iPhone):


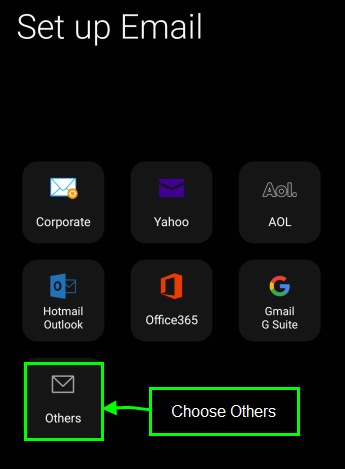
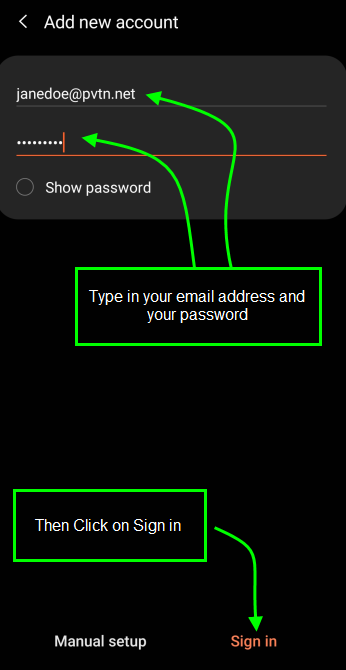
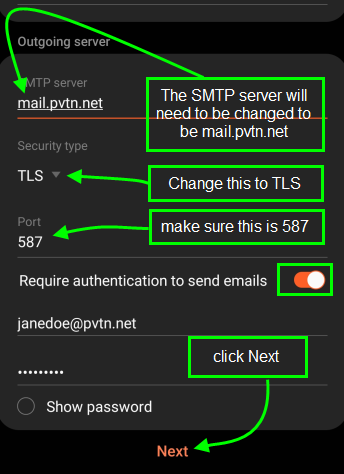
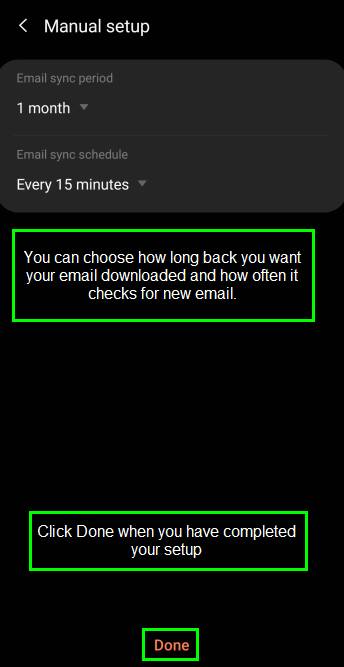
On Android devices:


Did you know you can receive important updates and notifications directly on your phone?
By opting in to our text message notifications, you’ll always be in the loop.
Opting in means you’ll get timely alerts for events, outages, bill availability, and payment reminders. It’s a convenient way to stay informed and manage your account effortlessly.
How to Opt In: To start receiving text message notifications, follow these simple steps:
- Visit our online payment portal or open the PVT Connect iOS or Android app.
- Navigate to ‘Account Settings.’
- Select ‘Manage Notifications.’
- Enroll in ‘Billing,’ ‘Marketing,’ ‘Miscellaneous,’ and ‘Service’ text messages.
Customization: You can customize the types of notifications you receive by managing your preferences in the ‘Manage Notifications’ section of the online payment portal or the app.
No Additional Cost: There is no extra charge for receiving text message notifications. Standard messaging rates may apply based on your mobile carrier plan.
Need Help? If you need assistance with opting in or managing your notifications, our customer experience representatives are here to help. Feel free to reach out with any questions.
Watch the video below for instructions on performing a speed test of your connection.
If you are experiencing issues with your TV, follow these steps to identify and resolve the problem:
1. Check Your TV Channel
Make sure your TV is set to Channel 3.
-
- To operate correctly with the PVT digital cable box, your TV must be tuned to Channel 3.
2. Use the Correct Remote
Are you using the remote that came with your PVT digital cable box?
-
- Only the remote provided with the PVT digital cable box is compatible.
- This remote is pre-programmed to control both your TV and the cable box, eliminating the need for multiple remotes.
3. Verify the Zoom or Aspect Ratio on Your TV
Do you see black frames around the screen or a distorted image?
- Your TV may be set to the wrong zoom level or aspect ratio.
- Refer to your TV’s user manual to adjust these settings for a full-screen viewing experience.
4. Check the Aspect Ratio on Your Cable Box (HDMI Connections Only)
Using an HDMI cable? Ensure the cable box’s aspect ratio matches your TV.
- Press the Menu button on the top-right corner of the remote.
- Navigate to the HDMI Setup menu using the arrow keys.
- Select TV Aspect Ratio and choose the correct option for your TV.
- Confirm by pressing the Apply button.
If these steps don’t resolve the issue, don’t hesitate to contact our friendly customer support team for further assistance. We’re here to help!


Remote Not Changing Channels or Operating the Cable Box?
If your remote isn’t working as expected, it’s crucial to ensure you’re using the remote that came with your PVT digital cable box. This remote is programmed specifically to control both your TV and the cable box, eliminating the need for multiple remotes.
Why the PVT Remote is Necessary:
- The cable box will not respond to the remote that came with your TV or other third-party remotes.
- Most issues, like being unable to change channels, can be resolved by using the correct remote.
- The PVT remote is designed for full compatibility, ensuring seamless operation between your TV and cable box.
If you’ve misplaced your PVT remote or continue to experience issues, please contact our support team for assistance. We’re here to help you get back to enjoying your favorite shows without interruptions!
Windows Live Mail 2012 Setup
- Click on the Accounts Tab at the top of the page, then select Email from the New Account section
- Fill in your Email Address, Password and the Display name for your sent messages, then click Next
- In Server Type click the arrow and select IMAP. Type in the following for Incoming Mail Server: mail.pvtn.net put a check mark in Requires a secure connection (SSL) and make sure the port is 993. Verify Authenticate using is set to Clear Text. Enter your Full Email Address in the Logon user name field. Type in the following for Outgoing Mail Server: mail.pvtn.net, and set the outgoing port to 587. Put a check mark in Requires a secure connection and a check mark in Requires authentication.
- Click Next, then click Finish


Windows Live Mail 2012 Verifying settings
- To verify all settings are correct: click on accounts, then Properties
- On the General Tab, verify the name of the email, your name and email address are filled in, if you would like to fill in additional information, that could be done here. Make sure the check mark is in the Include this account when receiving mail or synchronizing.
- On the Servers Tab, in the Server Information section, verify the IMAP is the type of incoming mail server that is being used, mail.pvtn.net is in both, Incoming mail (IMAP) and Outgoing mail (SMTP). In the Incoming Mail Server section, make sure your full email address is the Email username and your password has been entered, and remember password has a check mark next to it, and logon using clear text is selected. Outgoing Mail Server section, make sure My server requires authentication is checked.
- On the Security Tab, in the Signing certificate section make sure the Certificate box is empty. In the Encryption preferences section, make sure the Certificate box is empty and the Algorithm is set to 3DES
- On the Advanced Tab, in the Server Port Numbers, make sure the Outgoing mail (SMTP) port is 587, and This server requires a secure connection (SSL) is checked. The Incoming mail (IMAP) port is 993 and the check mark is in This server requires a secure connection (SSL). In the Server Timeouts section, default is 1 Minute. And in the Sending section, no check mark is required for Break apart messages larger than.
- On the IMAP tab, in the Folders section, Root folder path is empty and a check mark is in Check for new messages in all folders. In the Special Folders section, a check mark should be in the Store special folders on IMAP server and the default paths are set for each folder. Once verified, if any changes have been made, click apply, and then this box can be closed by clicking on the red X in the top right corner.


